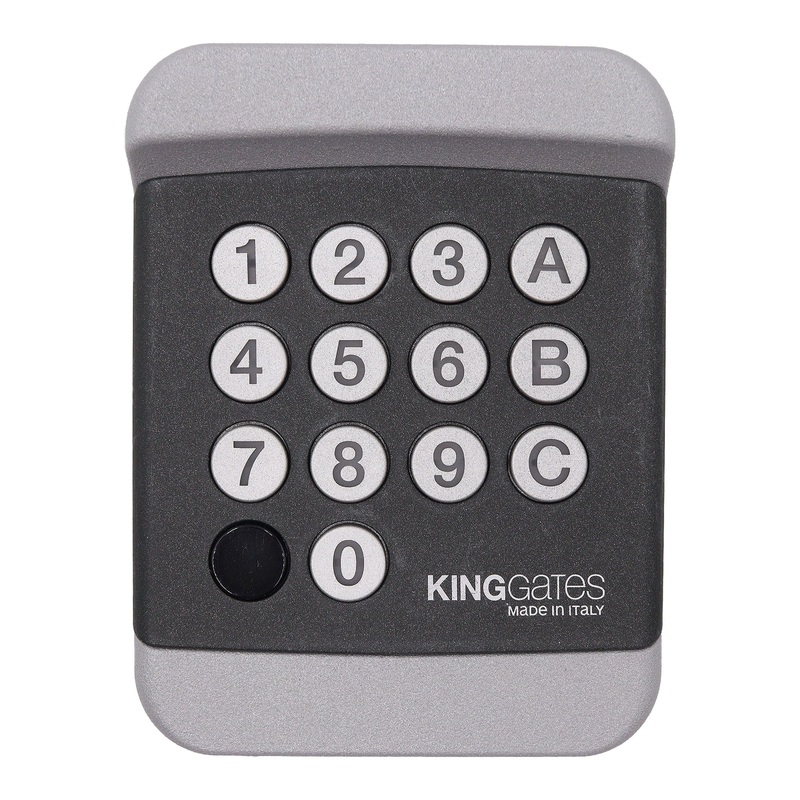
King Gates Genuine Wireless Keypad
Download Instructions Instructional VideoKing Gates Wireless KeypadFor compatible remotes for this keypad please Click HereHow to use the unitKey-in your security code followed by the Letters A, or B, or C.6 seconds allowed between each press of a button.B
Category: Keypad
Tag: Black Friday Clearance
Download Instructions
Instructional Video
King Gates Wireless Keypad
For compatible remotes for this keypad please Click Here
How to use the unit
- Key-in your security code followed by the Letters A, or B, or C.
- 6 seconds allowed between each press of a button.
- Beep confirmation will be heard – see the table below.
BEEP MEANING SIGNALS
- 1 short beep – Confirmsa key press.
- 1 long beep morethan 6 seconds – try again form the beginning.
- 3 long beeps forcode programing – Code have been successfully changed
- Withregular use – Battery low -replace the battery, you will hear the beeps with the new battery stalled correctly
- 5 short beeps – something went wrong,try again
- Series of beeps over 2 sec – the batteries are exhausted and mustbe replaced
Maintenance
This unit does not require any special maintenance. Check it occasionally for spiderwebs, dust. wipe and clean wet cloth
Technical Specifications
- Operating Frequency: 433.92 MHz, compatible with all King Gates motors.
- Transmission Range: Effective up to 30 meters.
- Battery: 2 x CR2430 lithium batteries (included), providing up to 24 months of life based on moderate usage (10 operations per day).
- Number of Programmable Codes: 3 (A, B, C), with 1 to 8 digits per code.
- Weather Resistance: IP54-rated for outdoor use, ensuring protection against dust and water splashes.
- Operating Temperature: -20C to +55C, suitable for diverse climates.
- Dimensions: Compact design measuring 128 mm x 81 mm x 44 mm, allowing for easy mounting.
- Backlit Keypad: Illuminated for clear visibility in low-light conditions, ideal for nighttime use.
Replacing the battery (see figure on net page)
- Replace the battery every about 12 month, or when it dead. Please recycle the battery
- Remove the two screws at the bottom of the unit Fig. A
- Extract out the buttons plastic part form the metal case Fig. B
- Unscrew the battery cover with a coin and replace the battery
- Pay attention to the battery cover seal
- The positive poles (+) is facing you -Fig. 6
- Put new battery and close back the battery cover, screw with the coin- Fig.6
- Fit the plastic button unit back to the metal case Fig. 7
- Screw the two bottom screws -Fig.8
Programming new security codes notes
WARNING !
- Losing a code, or mistake with the codes, will totally damage the unit.
- The manufacturer warranty does not cover for loss, or mistakes with codes.
- Read and follow the instructions. If you are not sure, ask a technician to assist.
- Claim of incorrect factory default codes will not be covered by warranty.
- Check the default codes before doing the programming, read this instruction manual fully and make sure that you understand it.
Installation of the unit
- Before installation check reception form the desired installation location
- Choose a flat surface for installation, chose the right high tot be comfort for adult and or children users
- Extract out the button plastic part form the metal case – Fig. 2
- Punch holes in the metal case for the screws to fit it to the wall/ post
- Fit the metal case of the unit to the wall / post with screws – Fig. 5
- Put the rectangle black rubber par to its place – Fig. 4
- Install the unit in the correct directions so the numbers and letters are facing up correctly- Fig. 5
- Fit the buttons part back to the case of the unit – Fig. 7
- Screw in the two screws at the bottom – Fig. 8
| Battery Type: | Battery type TBA |
| Battery Access Type: | Tool Required |
| AS62368.1 Compliant: | Compliance TBA |
| Battery Included: | Yes |
| Contains Coin Battery: | Coin Battery TBA |

Reviews
There are no reviews yet.